Okay. I put it off and put it off but am finally getting ready to post my review of my riding gear.
PICTURES ARE AT THE BOTTOM for those who only care about my digital photo skillz and not so much about my rambling…
A little about me. I’m 6’4” at 265lbs with a nice sized beer gut. I’m 36 years old and I live near Atlanta, GA. I ride a Kawasaki Concours with a 26.5 inch Cee Bailey vented windshield. I am hot natured and I HATE the heat. I am a novice rider (rode lots of dirt bike back in my teens but never street bikes) and started this past summer. My previous experience with riding gear was a Joe Rocket Phoenix mesh riding jacket and jeans. I am not much of an outdoorsman and I have a desk job.
Why is any of this important? Well, if I say that I get very little ventilation, keep in mind that I ride a full fairing bike. If I say that this suit is the most abrasion resistant thing I’ve ever worn, keep in mind that my previous jacket was a Joe Rocket… you get the picture?
Why Motoport (Cycleport)? Well, I read this article. After which, I realized that if I didn’t get something more than what I had, I’d never got on the bike again. I had read some stuff about the Motoport products and basically, I believed Wayne Boyer’s marketing. He seemed passionate and upfront enough about his product and what it was constructed from and after about 30 minutes of trying to find out what my Joe Rocket was made out of, I gave up. But, I couldn’t really afford it. When I read the article above, I called Wayne the next day and charged it!
The Ordering Process.
Wayne has openly stated that his website is pretty bad. It lacks the pictures needed to convince you to spend so much on riding gear (I know some other riding gear can be pretty pricey, but, keep in mind, my only experience is with a Joe Rocket jacket… see? Wasn’t it a good idea to tell you a little about me?). I emailed Wayne, told him what I was interested in, and he sent some fabric swatches of the material I was considering, in various colors. That helped quite a bit.
Once I was convinced, I called Wayne’s shop and put in my order. The lady who took my call said that I had a few weeks to get all my modification and color requests in before they actually started on my order. Since it was important to me to get into the production queue I made the order before I decided on colors.
I followed the directions on the website to do my measurements. This is another area that could stand some “how to” pictures. When I called Wayne for some clarification, I felt a little better about the process. One thing about Wayne is that he has answered the same questions over and over, he can spit out about 15 different options and descriptions of various things and it’s easy to get bewildered. But, I’m a public proclaimed idiot and I told him this. I had to him go step by step, very slowly and he was quite patient with me.
So, a couple weeks after I put in my order, I sent in my final measurements and my modification requests. Seems like I ordered somewhere in early October. I got my stuff right after Thanksgiving. I’m too lazy to get the specifics but I got it quicker than I expected.
A word about the manufacturing process… After reading the website, I had concluded that each garment was custom made for the buyer at his shop in California. After discussing a few things with Wayne and reading some other info on the net, I found out that apparently, some of his products are actually assembled in China. I also found that Wayne uses a bunch of pre-made patterns of various sizes and has most of the gear made in China to those specifications. When an order comes in, he looks at the measurements from the buyer and then decides what pattern (size) the buyer needs. I think the products are made in China to fit a pattern and then “custom altered and modified” at the Motoport shop to fit the customer. I think it would be in Wayne’s best interests to clarify some of this on his website, but it didn’t matter to me at all as I was already a Motoport Fanboy!
A further word about sizing. All the prices on the Motoport website reflect the cost for buyers who fit into one of the pre-done size patterns. If you don’t fit into one of these patterns, you’ll incur a “custom” cost increase. Wayne can tell you at ordering time (provided you have your measurements) if you are outside the parameters. I have a coworker who could not be fitted and had to cancel his order as he didn’t want to spend the additional 400 dollars or so.
What I Ordered:
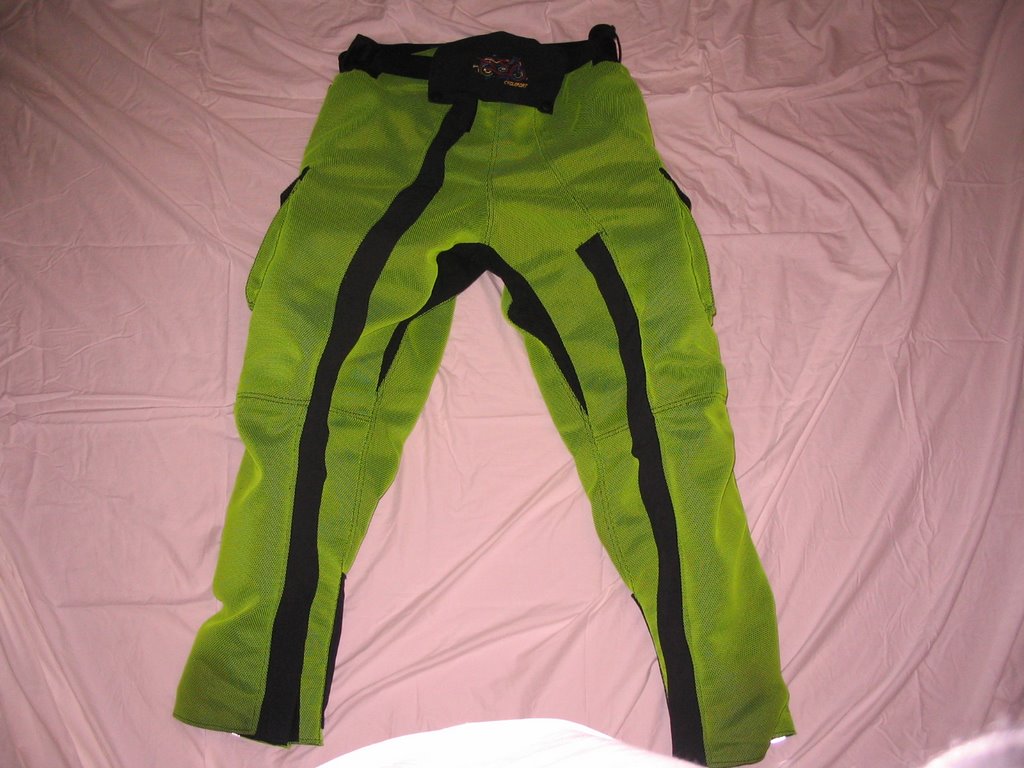
Since I live in Atlanta where most of the year is spent in warm/hot/muggy/humid conditions, I went with the Air Mesh Kevlar material. I wanted the protection of leather but didn’t want to melt. My previous jacket seemed to breathe pretty well and got plenty of ventilation but after reading about Road Rash girl, I didn’t trust it anymore. The Air Mesh Kevlar is supposed to breathe really well. Add the liners to that, and it should be an all year round kind of gear.
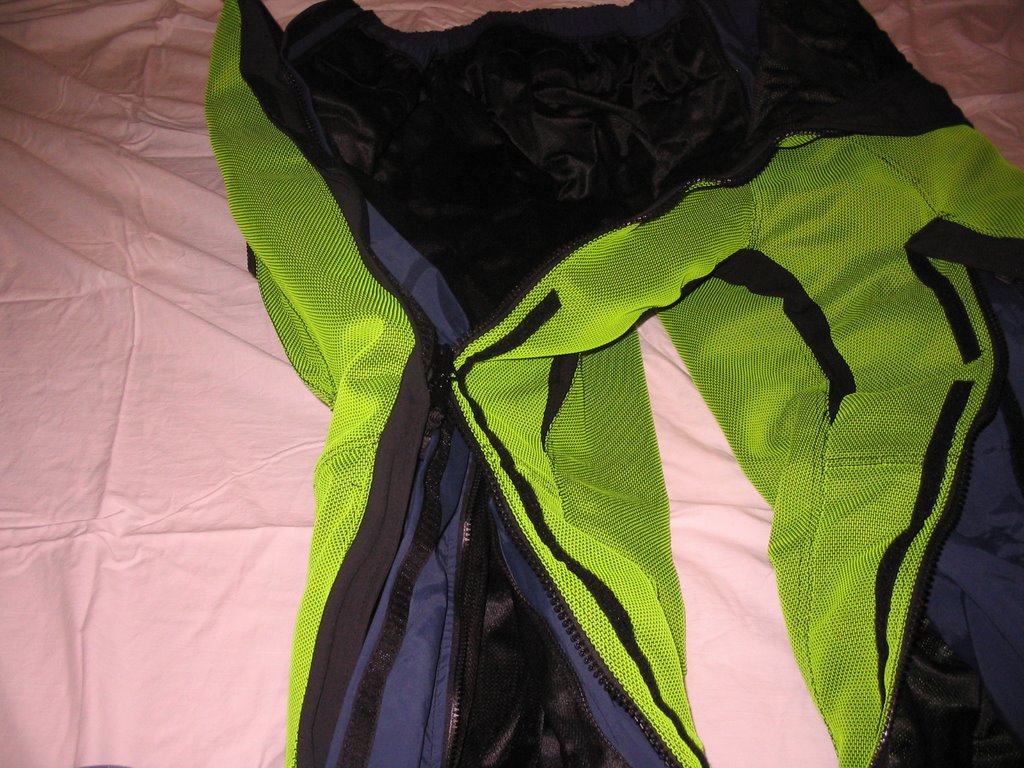
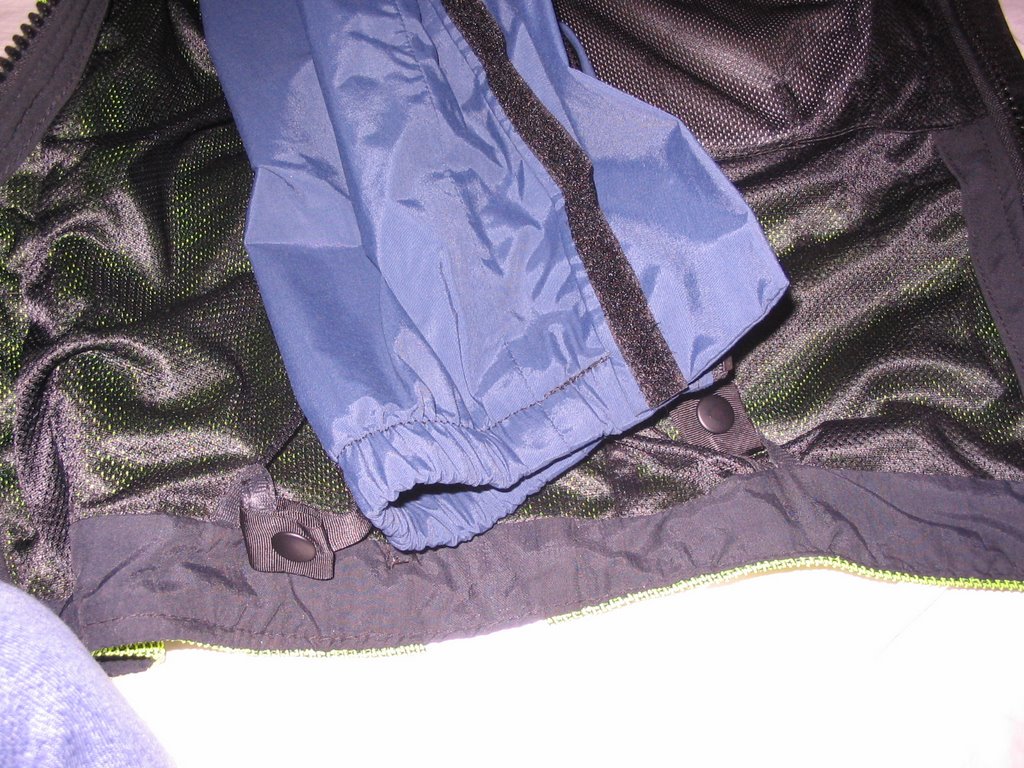
So, I ordered the Ultra II Air Mesh Kevlar ¾ length jacket and the Air Mesh Kevlar pants. I ordered all liners for them as well. They offer a waterproof, windproof, breathable liner as well as an insulated liner. With regards to the jacket, you can put in either liner (or both) as needed. However, Wayne said that they could never come up with a good way to integrate both liners with the pants. So, as it stands, you can get the waterproof (I’m not going to type out the windproof, breathable part each time) liner OR you can get the insulated liner sewn into the waterproof liner. You can’t separate the insulated liner from the waterproof liner. So, I went with JUST the waterproof portion for the pants.
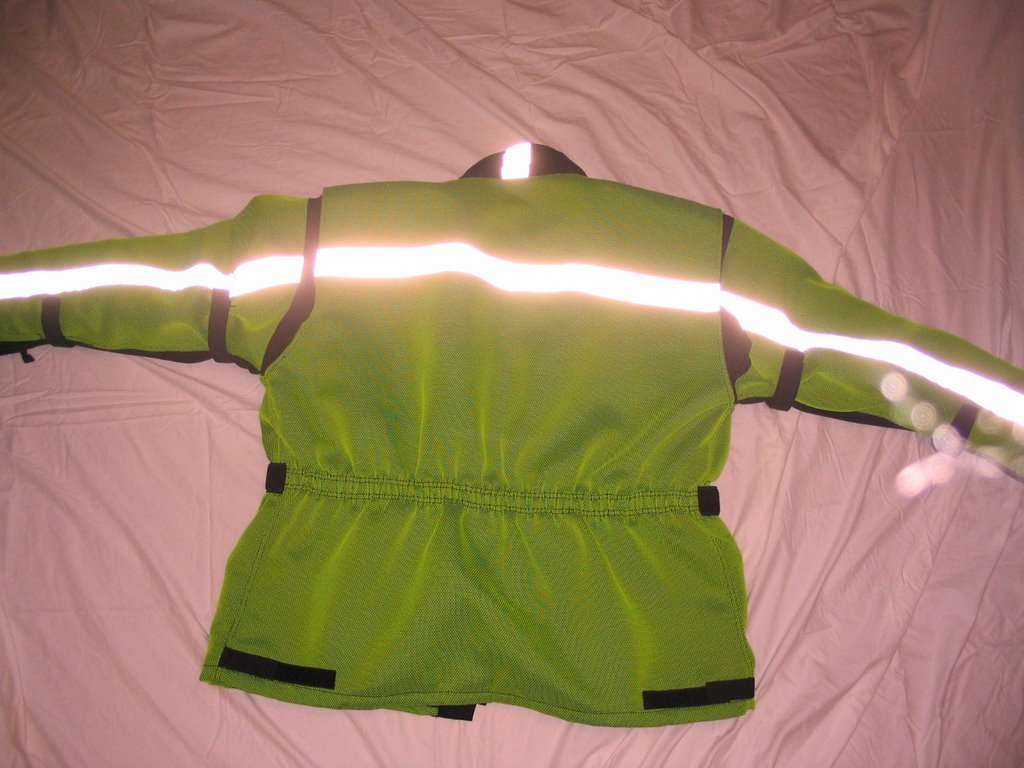
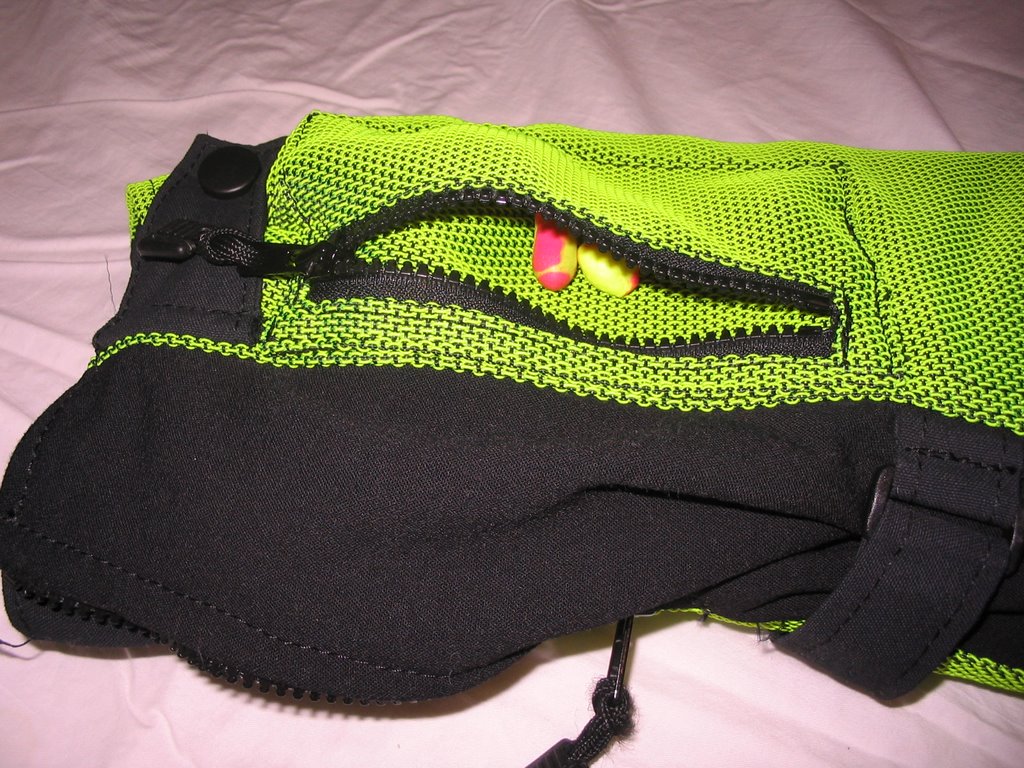
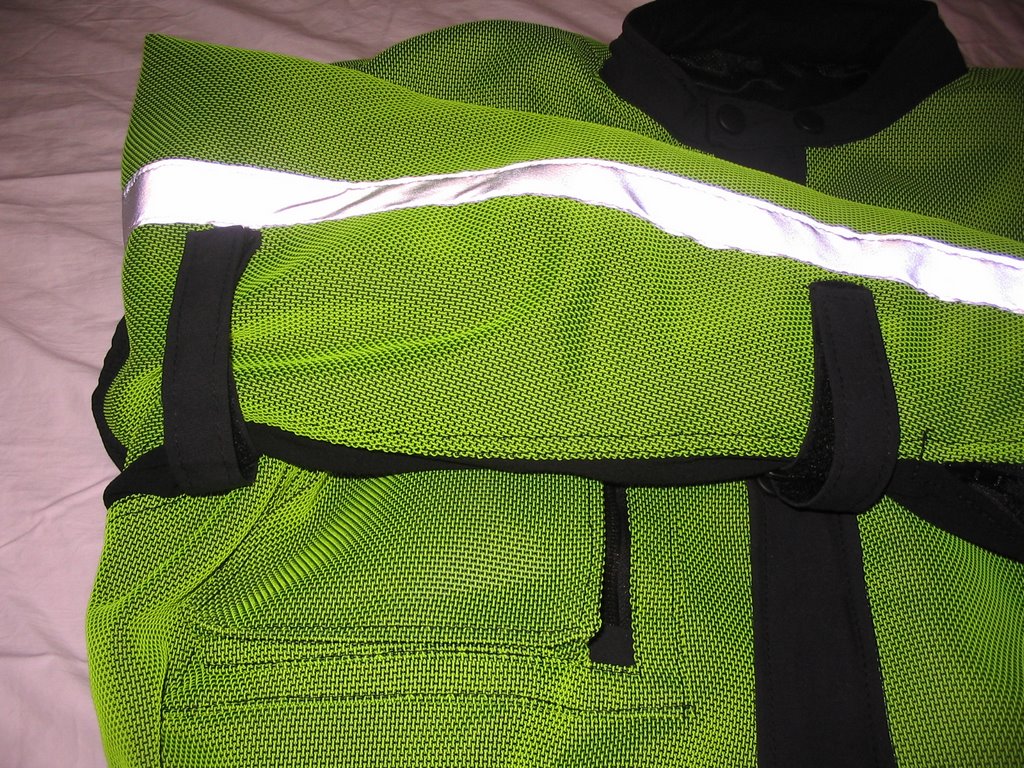
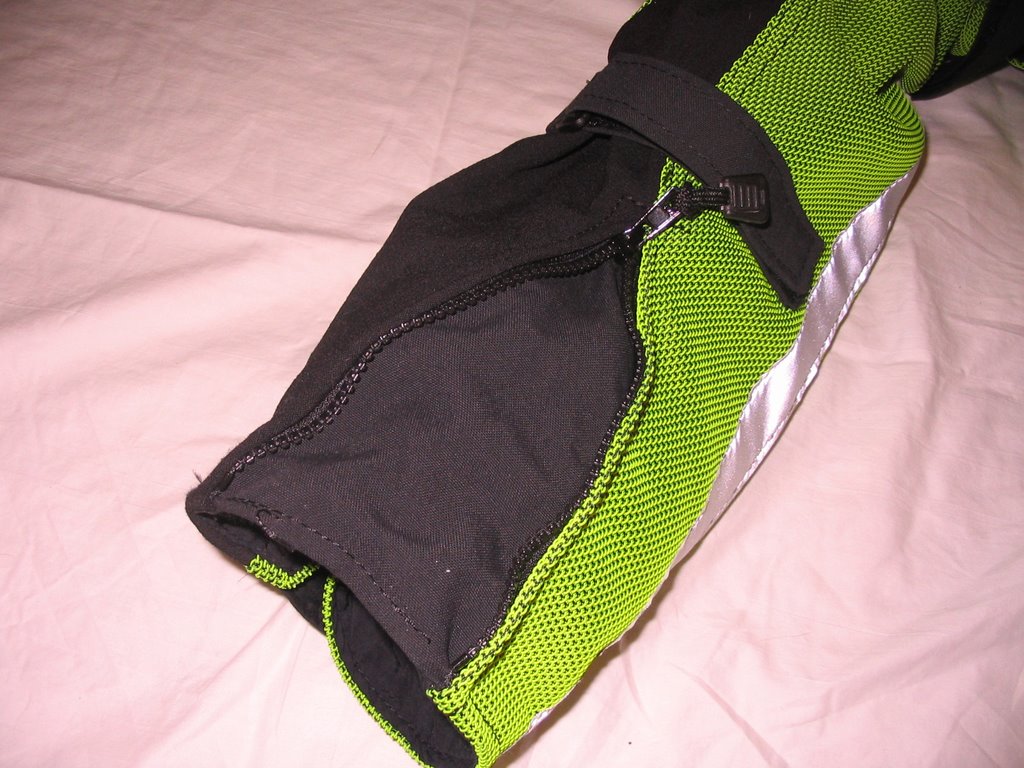
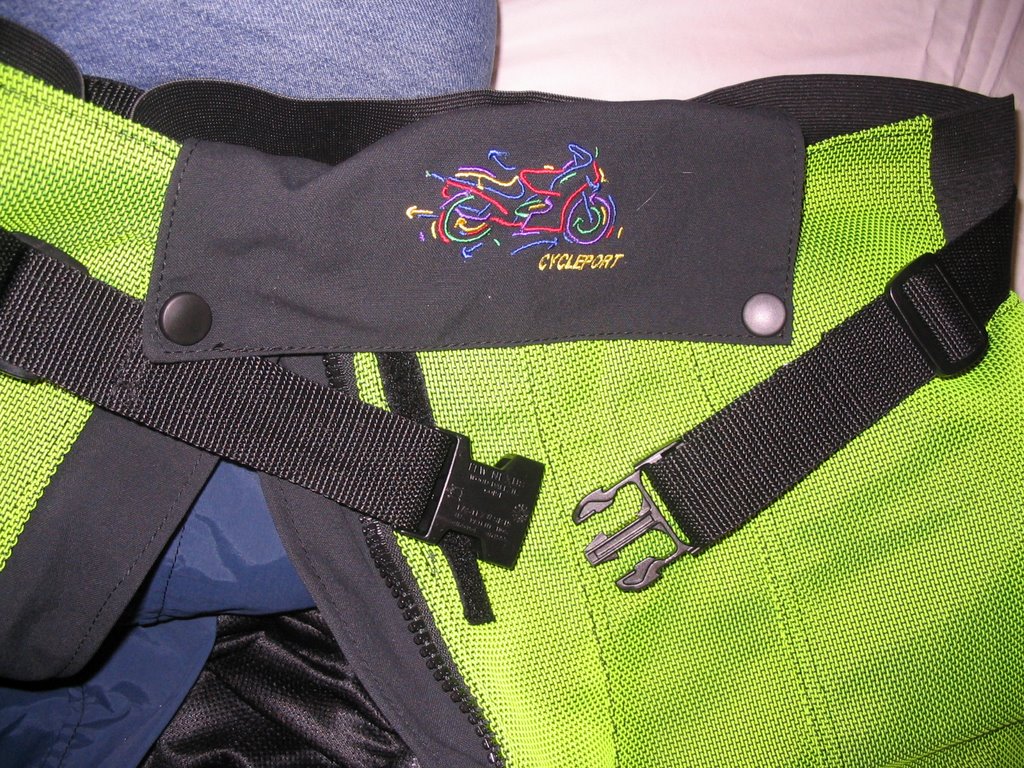
I ordered the entire suit in the Hi-Viz yellow/green. I had the bottom pocket lids changed from black to Hi-Viz as well – you’ll see in the pictures. I also had them put in a right arm cuff pocket for keys, change and earplugs. I requested the reflective stripe be done all the way down each arm as well. On the pants, I requested hip pads also. This added a bit to the cost of the order but compared to the grand total, it didn’t seem like much.
Initial Impressions:
Okay, I am going to try and make this as organized and to the point as possible, but it probably won’t wind up that way. I’m quite verbose and just as scatter brained….
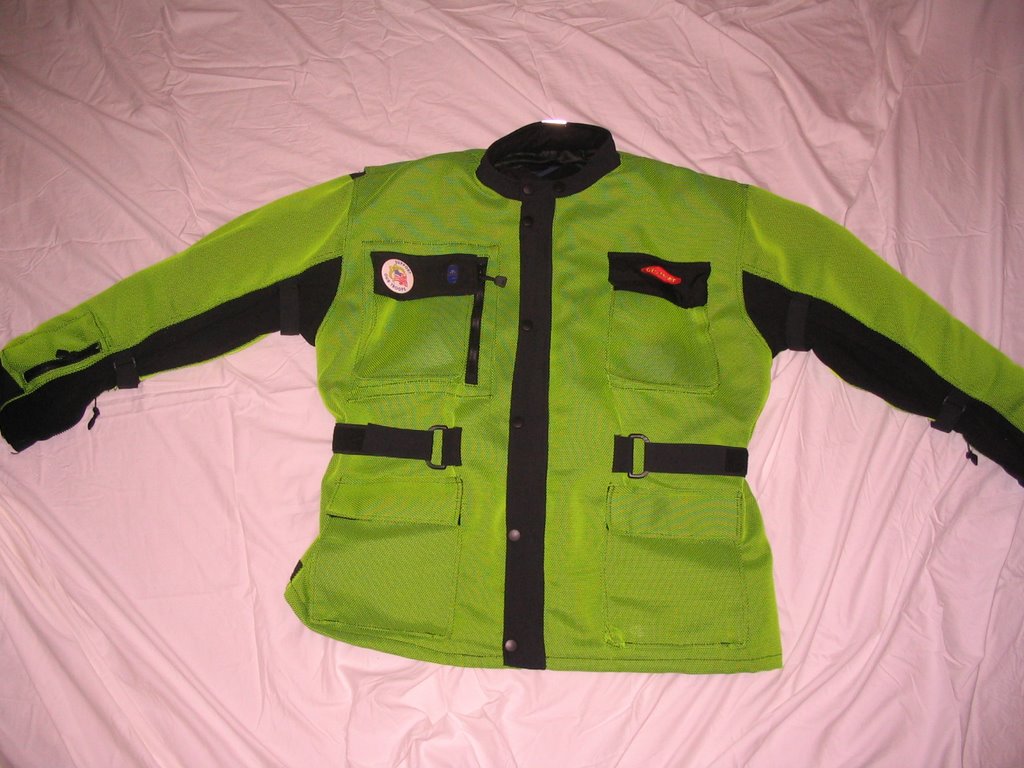
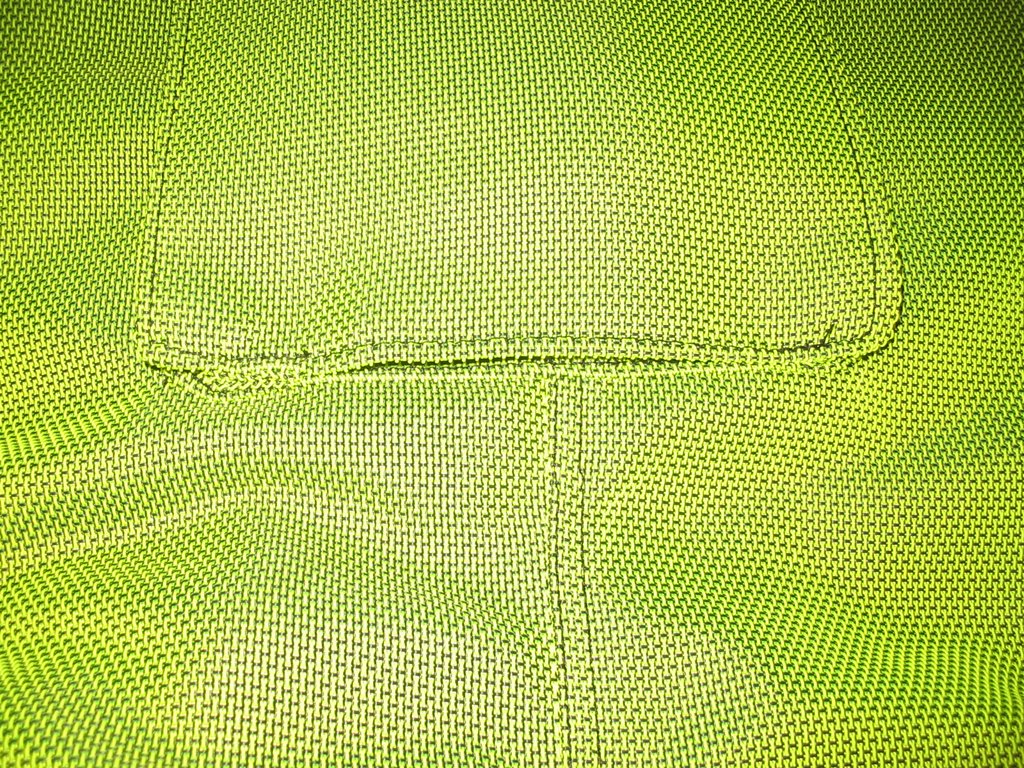
The first thing I thought of when I opened the box was, “GREEN!” The Hi-Viz is just what it says it is, Hi-Viz. While it’s not as vibrant as some of the other materials I’ve seen (Wayne had sent me a cordura sample in Hi-Viz that would almost burn your retinas out!), it was plenty Hi-Viz. This had been a concern as the Air-mesh seemed to be have the least hi-viz qualities. BUT, I was not disappointed. When I got it into the daylight, the effect was even more so.
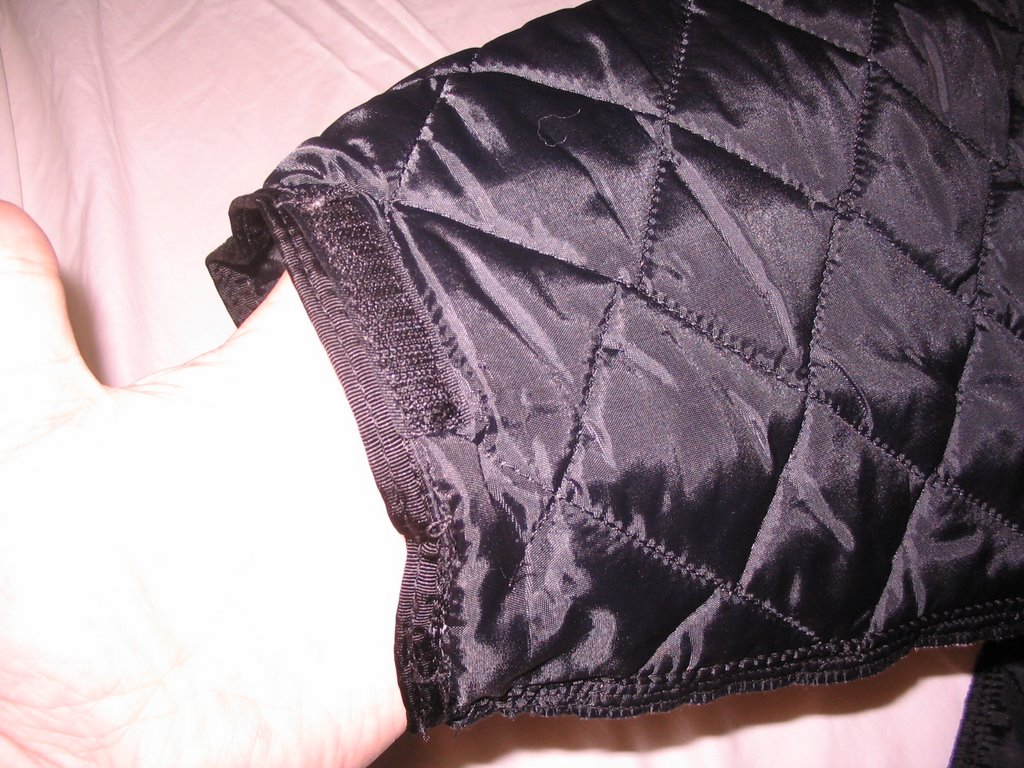
The next thought out of my head was, “Ouch!” This material is, for lack of a better word, abrasive. I may never get road rash, but if you get too close to me, I might just inflict some of it. My previous jacket was nice and soft, both inside and out. But the Motoport is rough and course. Like a cheese-grater (or as Mitch Hedberg says, a sponge-ruiner). However, once you have it on, the jacket’s liner (not the added liner, but the one sewn into the jacket) keeps it off of you.
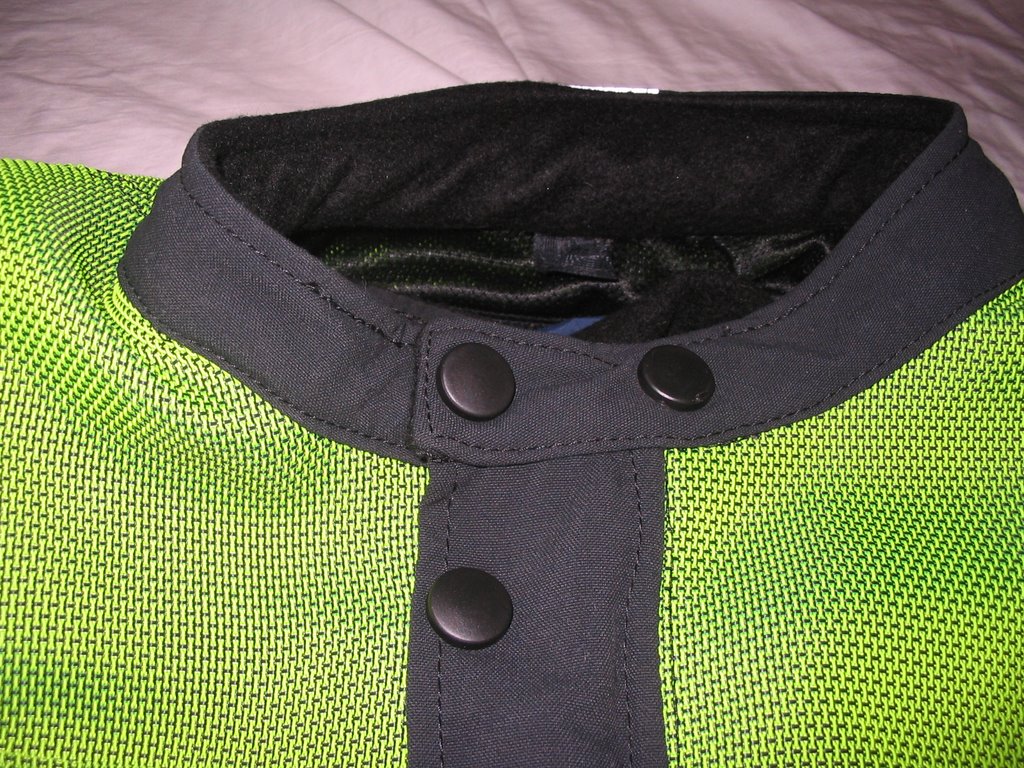
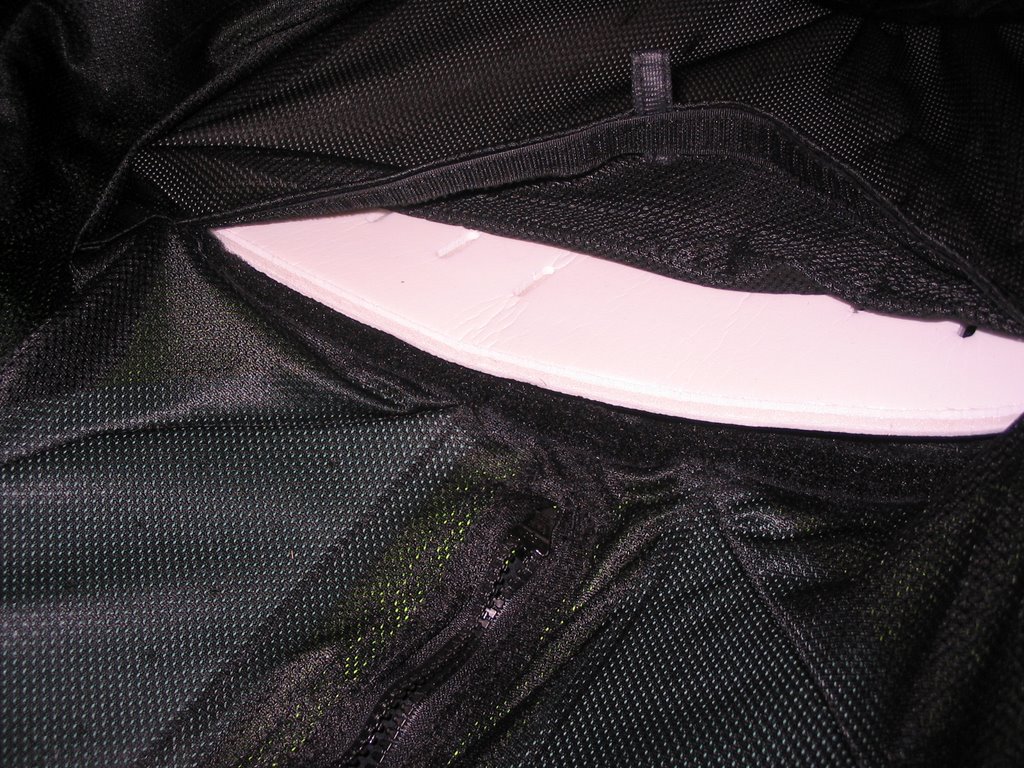
Construction. Everything seems heavy duty. The zippers on the jacket are industrial elephant strength. I’ve never seen YYK zippers this big. Well, once I did… on the tarp that covers the Space Shuttle! No, not really. But, they are pretty robust. The seams all seems to be heavily stitched and very stout. The buttons and snaps are quite strong and are not for the faint of heart. The ubiquitous Velcro (I don’t know if it is actually Velcro per se or some other kind of hook/pile stuff) is VERY strong. There’s not much to say beyond that. It is heavy duty all the way around. Doesn’t seem to be any area where consideration was not given to durability and ruggedness. When Wayne sent me the sample air mesh swatches, I cut a slit in one of them, just wide enough to get 2 fingers in and then tried to pull it apart with both hands. No dice. I would have sliced my hand open. I showed it to several people and they were amazed by the material.
Fit. I’m a big guy. Apparently, I fit into the XXXL pattern on the jacket and the pants. I’ve read elsewhere that the suit would feel “bulky” initially so I was prepared for that. They weren’t kidding! When I sat down, the thigh armour looked like two plates stuck to the side of each thigh. It was far from form fitting! The jacket was pretty stiff too. I felt like David Byrne and his Big Suit!
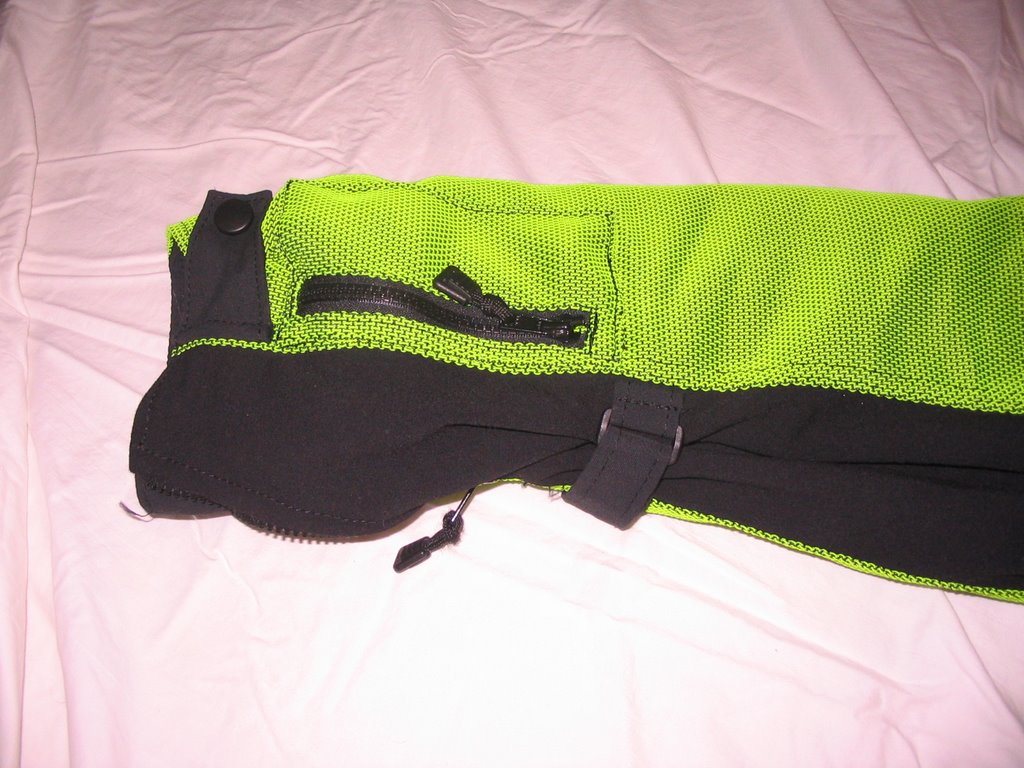
There are lots of adjustments available. There are several buttons on the cuff. Two Velcro straps on the arms to cinch them down. A waist belt like adjustment on each side of the waist to snug it up against you. Also, there are another set of Velcro adjustments along the back bottom of the jacket’s hem. The pants a very versatile (and strong) buckle system with very tall stretchy material on the waist. There is also a set of Velcro strips along the ankle to adjust for different boot types or calf widths. At least that is what I think they are for. They might be just another way of adding more Rambo strength Velcro…
Ride Tests and Further Impressions.
I sold my Joe Rocket jacket. After wearing this thing one time, I decided that I’d never get on the bike without it. It felt like tissue paper compared to the Motoport. I almost felt guilty for selling it to a co-worker. But since he was not wearing any kind of jacket prior to that, the Joe Rocket is better than nothing.
I’ve ridden in the high 40s wearing just a long sleeve t-shirt under the jacket (with waterproof liner) and jeans under the pants (no liner). I added the liner to the pants, and put the insulated liner in the jacket and was fine (jeans, t-shirt) well into the 30s. Only my hands and neck were cold (I’ve since gotten better gloves and a Schampa neck gaiter).
I’ve not had it in the rain much yet. A sprinkle or drizzle here or there, but nothing to write home about. I had hoped (in a morbid sense) to get into some rain on a recent drive to Nashville, but I dodged the rain all weekend long. I’ll update my comments to that regard as they happen as well as hotter weather experiences.
It’s very visible. Friends have spotted me all over town. They said had it not been for the suit (the “booger suit” as it’s becoming lovingly known), they wouldn’t have seen me from so far away. I’ve had people ask me if I was with FEMA, DOT or a cop. I had a sheriff stop and tell me that the suit “stood out from a mile away” (his words, not mine). The reflective stripes on the back, sleeves and pants work well too. My girlfriend followed me home one night and she said that she couldn’t see the suit’s color any more but she could sure see the stripes. If I had it to do over again, I probably would have had another stripe put on the back – maybe 5 inches lower than the other one… just for general purpose. I’m all about the HI-VIZ!
The fit has gotten better and better. I’ve got about 1200 miles on the gear now and the armour is contouring to my shape. The mesh material has calmed down a bit. Wayne suggests tossing it in the dryer on NO HEAT for a while so soften up. I have not done this. But it IS getting less cardboard-y in general. I expect it to only get better.
Gripes:
I hesitate to call these “gripes” per se. They are very minor and more like “non-positive observations” than complaints.
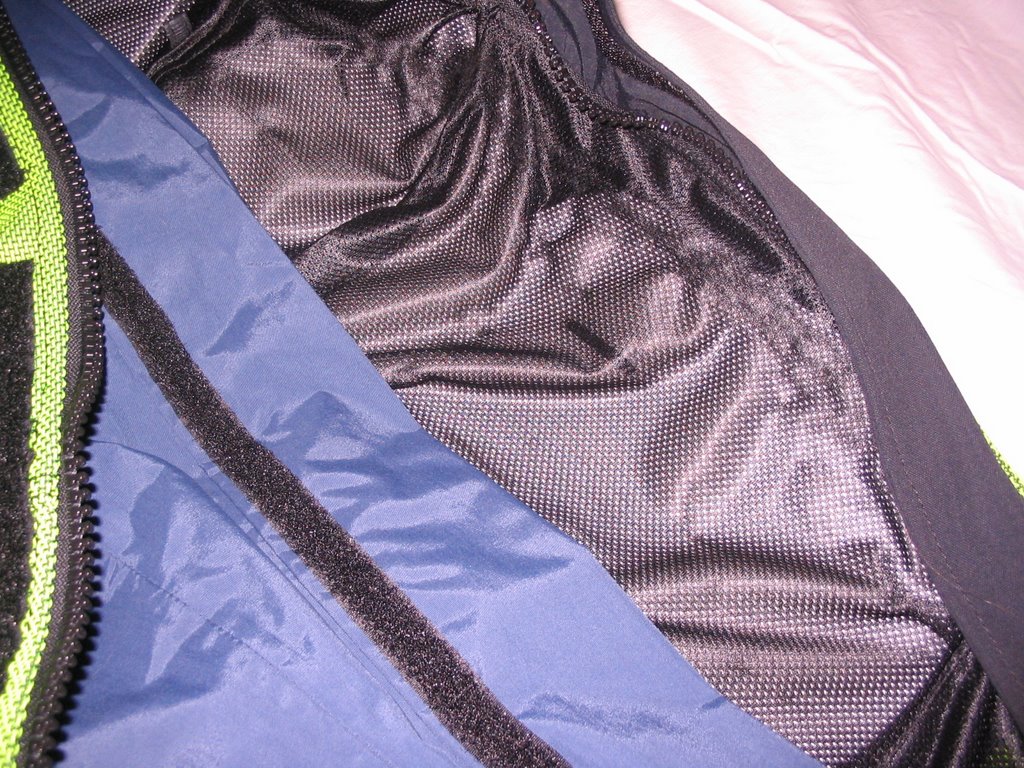
The Velcro… it does what it’s supposed to do. And then some. I am forever pulling the soft liner (the sewn in blue/black liner) off the Velcro. It’s even started to make the liner a little fuzzy in places. I think this will probably be the only thing that ever wears out on the gear. Though, I’d imagine that’s a long way off. There is so much Velcro that it seems like it’s a losing battle to keep the pants from getting the ankles stuck together when you are taking them off or putting them on. This is minor.
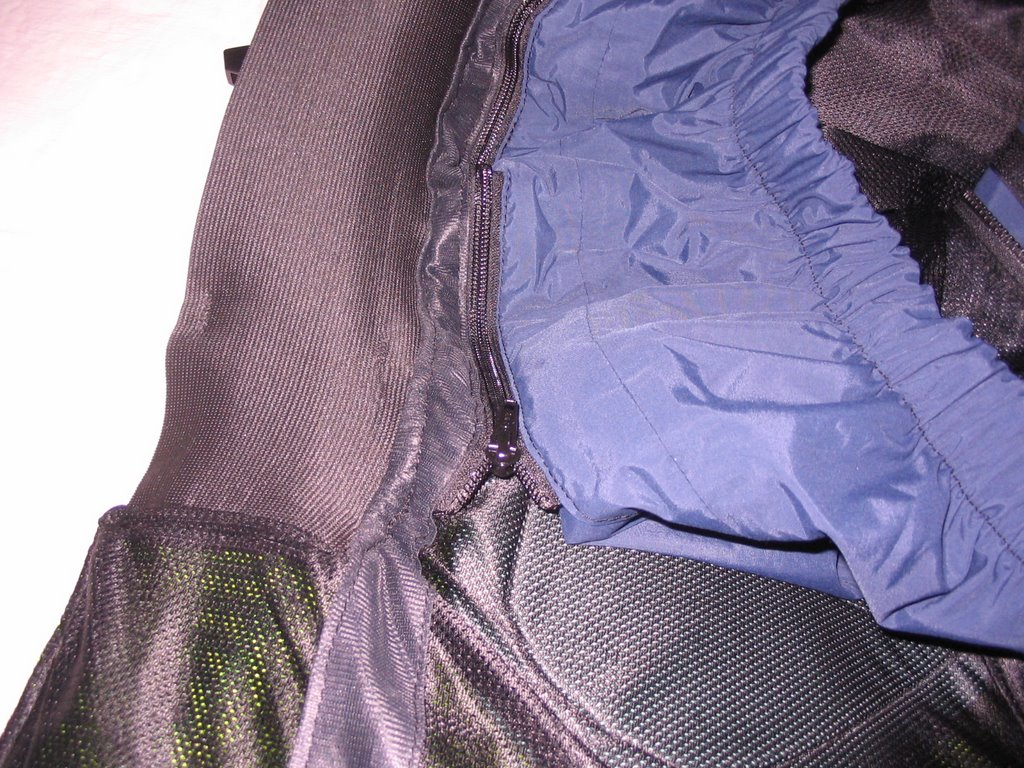
The zipper on the jacket… This thing is my single biggest complaint. I’ve not come up with a fool proof way of getting the double direction zipper to seat each time. I’ve read that others have had the same problems. Sometimes it goes in the first time. Other times, it might take me 10 or more tries. This is really only a problem when I’m trying to suit up fast.
The cuffs. When you have the cuffs buttoned up, they form a couple sharp edges and corners that can bother my wrists a bit. Don’t know how to make this any better really. Other than to add the liner material farther down the cuff. It’s not a huge deal. When I am wearing non-gauntlet gloves is about the only time I notice it.
Abrasion. When I was in the Army, I was a crewman on a Bradley Fighting Vehicle. There were LOTS of sharp edges on the Bradley. You were always coming home with cuts, scrapes or abrasions that we called “Bradley Bites”. Well, I’ve gotten a few “Motoport Bites” on my soft hands (I’m not a rugged ranch hand, remember?). If I try to get into one of the pockets too quick, I’ll scuff a knuckle when I try to slide my finger under the Velcro lip. Do this a bunch of times a day and I get a nice little scrape. I am teaching myself to pull them open rather than slide my finger under it like a letter opener. No big deal though. Don’t put “scratch” susceptible stuff in the pockets though. I put a pair of cheap sunglasses in the exterior breast pocket and scratched the finish off the frames – didn’t hurt the lenses though.
WARNING! The pants and jacket scratch the paint on my bike. I added a bra and some tankslapper material to the side body pieces to protect them. I think the scratches are minor enough to buff out but I’ve not gotten around to that just yet (like SO many things in my life).
At the moment, that’s about all I can say about the stuff. I am a believer in Motoport’s products. My father ordered some Cordura pants a few weeks ago after seeing my stuff (he didn’t have the budget for the air-mesh stuff but loved the craftsmanship). I think Wayne would sell even more of this stuff if some effort was made to polish up the product presentation, but this has been talked about elsewhere.
I hope to put some further updates to this review as I experience different weather conditions and have a chance to break the gear in even further.
This review is MY OPINION. I do not want to start a flame war or a bitch fest. That is being done elsewhere. My goal for doing this was to give more information about the product. Wayne didn’t ask me to do this, though I hope he finds the review to be objective. When I was shopping for me gear, I was sad to see so little information out there. I hope this review helps someone else make a decision. And bottom line, WEAR PROTECTIVE GEAR!
PICTURES ARE AT THE BOTTOM for those who only care about my digital photo skillz and not so much about my rambling…
A little about me. I’m 6’4” at 265lbs with a nice sized beer gut. I’m 36 years old and I live near Atlanta, GA. I ride a Kawasaki Concours with a 26.5 inch Cee Bailey vented windshield. I am hot natured and I HATE the heat. I am a novice rider (rode lots of dirt bike back in my teens but never street bikes) and started this past summer. My previous experience with riding gear was a Joe Rocket Phoenix mesh riding jacket and jeans. I am not much of an outdoorsman and I have a desk job.
Why is any of this important? Well, if I say that I get very little ventilation, keep in mind that I ride a full fairing bike. If I say that this suit is the most abrasion resistant thing I’ve ever worn, keep in mind that my previous jacket was a Joe Rocket… you get the picture?
Why Motoport (Cycleport)? Well, I read this article. After which, I realized that if I didn’t get something more than what I had, I’d never got on the bike again. I had read some stuff about the Motoport products and basically, I believed Wayne Boyer’s marketing. He seemed passionate and upfront enough about his product and what it was constructed from and after about 30 minutes of trying to find out what my Joe Rocket was made out of, I gave up. But, I couldn’t really afford it. When I read the article above, I called Wayne the next day and charged it!
The Ordering Process.
Wayne has openly stated that his website is pretty bad. It lacks the pictures needed to convince you to spend so much on riding gear (I know some other riding gear can be pretty pricey, but, keep in mind, my only experience is with a Joe Rocket jacket… see? Wasn’t it a good idea to tell you a little about me?). I emailed Wayne, told him what I was interested in, and he sent some fabric swatches of the material I was considering, in various colors. That helped quite a bit.
Once I was convinced, I called Wayne’s shop and put in my order. The lady who took my call said that I had a few weeks to get all my modification and color requests in before they actually started on my order. Since it was important to me to get into the production queue I made the order before I decided on colors.
I followed the directions on the website to do my measurements. This is another area that could stand some “how to” pictures. When I called Wayne for some clarification, I felt a little better about the process. One thing about Wayne is that he has answered the same questions over and over, he can spit out about 15 different options and descriptions of various things and it’s easy to get bewildered. But, I’m a public proclaimed idiot and I told him this. I had to him go step by step, very slowly and he was quite patient with me.
So, a couple weeks after I put in my order, I sent in my final measurements and my modification requests. Seems like I ordered somewhere in early October. I got my stuff right after Thanksgiving. I’m too lazy to get the specifics but I got it quicker than I expected.
A word about the manufacturing process… After reading the website, I had concluded that each garment was custom made for the buyer at his shop in California. After discussing a few things with Wayne and reading some other info on the net, I found out that apparently, some of his products are actually assembled in China. I also found that Wayne uses a bunch of pre-made patterns of various sizes and has most of the gear made in China to those specifications. When an order comes in, he looks at the measurements from the buyer and then decides what pattern (size) the buyer needs. I think the products are made in China to fit a pattern and then “custom altered and modified” at the Motoport shop to fit the customer. I think it would be in Wayne’s best interests to clarify some of this on his website, but it didn’t matter to me at all as I was already a Motoport Fanboy!
A further word about sizing. All the prices on the Motoport website reflect the cost for buyers who fit into one of the pre-done size patterns. If you don’t fit into one of these patterns, you’ll incur a “custom” cost increase. Wayne can tell you at ordering time (provided you have your measurements) if you are outside the parameters. I have a coworker who could not be fitted and had to cancel his order as he didn’t want to spend the additional 400 dollars or so.
What I Ordered:
Since I live in Atlanta where most of the year is spent in warm/hot/muggy/humid conditions, I went with the Air Mesh Kevlar material. I wanted the protection of leather but didn’t want to melt. My previous jacket seemed to breathe pretty well and got plenty of ventilation but after reading about Road Rash girl, I didn’t trust it anymore. The Air Mesh Kevlar is supposed to breathe really well. Add the liners to that, and it should be an all year round kind of gear.
So, I ordered the Ultra II Air Mesh Kevlar ¾ length jacket and the Air Mesh Kevlar pants. I ordered all liners for them as well. They offer a waterproof, windproof, breathable liner as well as an insulated liner. With regards to the jacket, you can put in either liner (or both) as needed. However, Wayne said that they could never come up with a good way to integrate both liners with the pants. So, as it stands, you can get the waterproof (I’m not going to type out the windproof, breathable part each time) liner OR you can get the insulated liner sewn into the waterproof liner. You can’t separate the insulated liner from the waterproof liner. So, I went with JUST the waterproof portion for the pants.
I ordered the entire suit in the Hi-Viz yellow/green. I had the bottom pocket lids changed from black to Hi-Viz as well – you’ll see in the pictures. I also had them put in a right arm cuff pocket for keys, change and earplugs. I requested the reflective stripe be done all the way down each arm as well. On the pants, I requested hip pads also. This added a bit to the cost of the order but compared to the grand total, it didn’t seem like much.
Initial Impressions:
Okay, I am going to try and make this as organized and to the point as possible, but it probably won’t wind up that way. I’m quite verbose and just as scatter brained….
The first thing I thought of when I opened the box was, “GREEN!” The Hi-Viz is just what it says it is, Hi-Viz. While it’s not as vibrant as some of the other materials I’ve seen (Wayne had sent me a cordura sample in Hi-Viz that would almost burn your retinas out!), it was plenty Hi-Viz. This had been a concern as the Air-mesh seemed to be have the least hi-viz qualities. BUT, I was not disappointed. When I got it into the daylight, the effect was even more so.
The next thought out of my head was, “Ouch!” This material is, for lack of a better word, abrasive. I may never get road rash, but if you get too close to me, I might just inflict some of it. My previous jacket was nice and soft, both inside and out. But the Motoport is rough and course. Like a cheese-grater (or as Mitch Hedberg says, a sponge-ruiner). However, once you have it on, the jacket’s liner (not the added liner, but the one sewn into the jacket) keeps it off of you.
Construction. Everything seems heavy duty. The zippers on the jacket are industrial elephant strength. I’ve never seen YYK zippers this big. Well, once I did… on the tarp that covers the Space Shuttle! No, not really. But, they are pretty robust. The seams all seems to be heavily stitched and very stout. The buttons and snaps are quite strong and are not for the faint of heart. The ubiquitous Velcro (I don’t know if it is actually Velcro per se or some other kind of hook/pile stuff) is VERY strong. There’s not much to say beyond that. It is heavy duty all the way around. Doesn’t seem to be any area where consideration was not given to durability and ruggedness. When Wayne sent me the sample air mesh swatches, I cut a slit in one of them, just wide enough to get 2 fingers in and then tried to pull it apart with both hands. No dice. I would have sliced my hand open. I showed it to several people and they were amazed by the material.
Fit. I’m a big guy. Apparently, I fit into the XXXL pattern on the jacket and the pants. I’ve read elsewhere that the suit would feel “bulky” initially so I was prepared for that. They weren’t kidding! When I sat down, the thigh armour looked like two plates stuck to the side of each thigh. It was far from form fitting! The jacket was pretty stiff too. I felt like David Byrne and his Big Suit!
There are lots of adjustments available. There are several buttons on the cuff. Two Velcro straps on the arms to cinch them down. A waist belt like adjustment on each side of the waist to snug it up against you. Also, there are another set of Velcro adjustments along the back bottom of the jacket’s hem. The pants a very versatile (and strong) buckle system with very tall stretchy material on the waist. There is also a set of Velcro strips along the ankle to adjust for different boot types or calf widths. At least that is what I think they are for. They might be just another way of adding more Rambo strength Velcro…
Ride Tests and Further Impressions.
I sold my Joe Rocket jacket. After wearing this thing one time, I decided that I’d never get on the bike without it. It felt like tissue paper compared to the Motoport. I almost felt guilty for selling it to a co-worker. But since he was not wearing any kind of jacket prior to that, the Joe Rocket is better than nothing.
I’ve ridden in the high 40s wearing just a long sleeve t-shirt under the jacket (with waterproof liner) and jeans under the pants (no liner). I added the liner to the pants, and put the insulated liner in the jacket and was fine (jeans, t-shirt) well into the 30s. Only my hands and neck were cold (I’ve since gotten better gloves and a Schampa neck gaiter).
I’ve not had it in the rain much yet. A sprinkle or drizzle here or there, but nothing to write home about. I had hoped (in a morbid sense) to get into some rain on a recent drive to Nashville, but I dodged the rain all weekend long. I’ll update my comments to that regard as they happen as well as hotter weather experiences.
It’s very visible. Friends have spotted me all over town. They said had it not been for the suit (the “booger suit” as it’s becoming lovingly known), they wouldn’t have seen me from so far away. I’ve had people ask me if I was with FEMA, DOT or a cop. I had a sheriff stop and tell me that the suit “stood out from a mile away” (his words, not mine). The reflective stripes on the back, sleeves and pants work well too. My girlfriend followed me home one night and she said that she couldn’t see the suit’s color any more but she could sure see the stripes. If I had it to do over again, I probably would have had another stripe put on the back – maybe 5 inches lower than the other one… just for general purpose. I’m all about the HI-VIZ!
The fit has gotten better and better. I’ve got about 1200 miles on the gear now and the armour is contouring to my shape. The mesh material has calmed down a bit. Wayne suggests tossing it in the dryer on NO HEAT for a while so soften up. I have not done this. But it IS getting less cardboard-y in general. I expect it to only get better.
Gripes:
I hesitate to call these “gripes” per se. They are very minor and more like “non-positive observations” than complaints.
The Velcro… it does what it’s supposed to do. And then some. I am forever pulling the soft liner (the sewn in blue/black liner) off the Velcro. It’s even started to make the liner a little fuzzy in places. I think this will probably be the only thing that ever wears out on the gear. Though, I’d imagine that’s a long way off. There is so much Velcro that it seems like it’s a losing battle to keep the pants from getting the ankles stuck together when you are taking them off or putting them on. This is minor.
The zipper on the jacket… This thing is my single biggest complaint. I’ve not come up with a fool proof way of getting the double direction zipper to seat each time. I’ve read that others have had the same problems. Sometimes it goes in the first time. Other times, it might take me 10 or more tries. This is really only a problem when I’m trying to suit up fast.
The cuffs. When you have the cuffs buttoned up, they form a couple sharp edges and corners that can bother my wrists a bit. Don’t know how to make this any better really. Other than to add the liner material farther down the cuff. It’s not a huge deal. When I am wearing non-gauntlet gloves is about the only time I notice it.
Abrasion. When I was in the Army, I was a crewman on a Bradley Fighting Vehicle. There were LOTS of sharp edges on the Bradley. You were always coming home with cuts, scrapes or abrasions that we called “Bradley Bites”. Well, I’ve gotten a few “Motoport Bites” on my soft hands (I’m not a rugged ranch hand, remember?). If I try to get into one of the pockets too quick, I’ll scuff a knuckle when I try to slide my finger under the Velcro lip. Do this a bunch of times a day and I get a nice little scrape. I am teaching myself to pull them open rather than slide my finger under it like a letter opener. No big deal though. Don’t put “scratch” susceptible stuff in the pockets though. I put a pair of cheap sunglasses in the exterior breast pocket and scratched the finish off the frames – didn’t hurt the lenses though.
WARNING! The pants and jacket scratch the paint on my bike. I added a bra and some tankslapper material to the side body pieces to protect them. I think the scratches are minor enough to buff out but I’ve not gotten around to that just yet (like SO many things in my life).
At the moment, that’s about all I can say about the stuff. I am a believer in Motoport’s products. My father ordered some Cordura pants a few weeks ago after seeing my stuff (he didn’t have the budget for the air-mesh stuff but loved the craftsmanship). I think Wayne would sell even more of this stuff if some effort was made to polish up the product presentation, but this has been talked about elsewhere.
I hope to put some further updates to this review as I experience different weather conditions and have a chance to break the gear in even further.
This review is MY OPINION. I do not want to start a flame war or a bitch fest. That is being done elsewhere. My goal for doing this was to give more information about the product. Wayne didn’t ask me to do this, though I hope he finds the review to be objective. When I was shopping for me gear, I was sad to see so little information out there. I hope this review helps someone else make a decision. And bottom line, WEAR PROTECTIVE GEAR!
posted by Toast at 1:19 PM
3 comments
![]()